Friday, August 31, 2012

Home Again, Home Again...

This past weekend, David and I went home to help my mom celebrate her birthday!  (Marley came too, of course!).  Amy just started her SENIOR YEAR at UNC (how in the world did that happen?!) and Scott was busy being daddy to our newest family member!  Meet Zoe!


I just love her rolls!


Zoe is a rhodesian ridgeback and is going to weigh (I think) about 100 lbs.  She's only 8 weeks old and already weighs 16.5 lbs!  Marley and Zoe have yet to meet, but I think it might be a showdown when they do! ;)

So David and I were the only grandkids around and we missed the ones that weren't there.  But we loved the food.  My mom always likes to have vegetables for her birthday and since she was born in August, it's the perfect time!  And of course we had cake and homemade ice cream.  :)


David and I had a little surprise, too!  We had an anniversary gift from my grandmother's cousin.

(yes, that is a cookie from our wedding!  No, we didn't eat it haha!)

 We like to really celebrate in our family, so starting our anniversary month a little early was totally fine with us!  :)


We got two gorgeous crystal champagne flutes--thank you so much, Melissa!  I believe Melissa collects crystal and this is from her collection.  David and I are so lucky to have such wonderful family members.

My grandparents had champagne ready for a nice toast!


I sure do love my husband.  We had so much fun celebrating my mom's birthday!


And of course, we can't forget sweet Marley boy- who needs a haircut!


Thursday, August 30, 2012

Kitchen Update

When we moved into our home, it was very plain.  Light cream paint on every. single. wall. Upstairs and downstairs.  I literally felt like I lived in a box!  We've lived here for a few years and have put some "homey" touches but we still have a lot of work to do! :)  We have decided to do one room at a time and I think I'm enjoying that.


Our most recent room was the kitchen!  I love to cook and I love how big our kitchen is!  But oh my gosh, it was so ugly and plain.  

Here are the before pictures:


In order to make our kitchen "ours", we did quite a few things!

painted the kitchen

put up a backsplash-- David did the majority of this project!  He had to cut every single piece with a wet saw and put it up all by himself!  When he added grout, I went behind him and wiped before the grout dried on the actual pieces.  That was hard work, y'all!  But so worth it.


Curtains over the sink (still needs some for the doors...)- These were towels I fell in love with at Anthropologie and given to me as a gift from my mom!  They say, "Fell in Love", "Got Married", and "Lived Happily Ever After."  So stinkin' cute!


Blinds on the windows

New light fixture    


Artwork on the walls (a wedding gift, a glass clemson pendant, and a craft project chalkboard)


New faucet for the sink


There are other things we want to do in the future like granite counter tops, new hard wood floors, new doorknobs, and a new kitchen table, but right now they aren't necessary (or in the budget, ha!)  But we are in love with how everything turned out!  It's so much more inviting now!


After pictures:


What do you think?! :)

Wednesday, August 29, 2012

Happy (Belated) Birthday, Mom!

My mom's birthday was this past Friday and because I'm now an adult and life seems to speed up instead of slow down, I haven't had a chance to actually write her "birthday post."  But in true Roberts fashion, I'm sure she won't mind extending her birthday a little bit longer! ;)

Happy Birthday to the woman who brought me into this world,


Who rocked me to sleep at night,


 Endured hours and days and months and years of attitude and stubborn behavior (and much, much more!)


Has taught me, and continues to teach me, the valuable life lessons I hold dear each day,


The person who stayed up late and took care of me when I was sick,


Who I watched countless movies with on the couch in our pj's,


Who did absolutely everything in her power to make sure I never wanted for anything,


An amazing daughter, sister, and grandmommy to her furbabies,


Who I am like in more ways than one and my biggest cheerleader,


Who gets me and loves me just the way I am,


And my best friend.


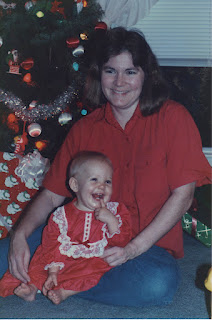
 Mom,  Happy belated birthday!  I love you so much and am glad I was able to celebrate with you this weekend. (Post to come!)  I am so glad I never had to share you with any other siblings because I like having you all to myself :)  You are the best mom God could have ever given me and I think He knew just what He was doing then.  You are a remarkable woman and have taught me so many things.  I looked up to you when I was 5 and I still look up to you now that I'm 25.  Thank you for being the wonderful example you have been through the years and I can't wait for many more years to come!  

Sunday, August 12, 2012

Time for Football!

It's almost time for football!  College football, that is.  I'm not much of a professional football kinda' girl, but I do enjoy watching a good college game.  I'm very excited for Clemson's football season this year! We have season tickets this year and because I'm not working Friday's or Saturday's anymore, I will actually get to go to the games!

So in the spirit of Clemson (and Pinterest...), and since my front door has been bare since the winter season, I decided to make a Clemson ribbon wreath!

First, I gathered all my supplies:


I used a 10" styrafoam wreath from Hobby Lobby, push pins, a ruler, scissors, and of course, ribbon!  I bought my ribbon at Wilson's (cheap, cheap ribbon!) and used about 5 or 6 different kinds.  I ended up getting 4 yards of each ribbon.

I used just a plain, satin ribbon to make my hanger.  I tied both ends around the styrafoam wreath and tied it into knots.  I left the ends a little long so the knots wouldn't come out, but if they were too long I had the option of cutting them.


Then I cut my ribbons into 4 1/2 in. pieces (roughly).


I took each piece of ribbon and made a loop, overlapping the ends about 1/4 in. and used the push pin to hold it in place.


Then I started putting the ribbons on the wreath, using the push pins!


I continued until I was satisfied. Then I hung it on my front door so the neighborhood can see who we'll be rooting for this year! :)


Some things I would do differently next time:
I liked this project, it was fairly cheap and pretty easy.  But if/when I attempt to do this next time, I'll do some things differently.
1. If I use a 10" wreath, I'll probably only get 3 yards of each ribbon.  I had too much left over with 4!
2. I'll experiment with making the loops smaller just to see what happens (if it looks neater, haha!)
3. I started with just one type of ribbon first, but then needed other ribbons to start filling with, so I stopped and cut the rest of my ribbon up.  Next time, I'll cut and pin all of the ribbon first so I can pin different ribbons from the beginning.

Go Tigers! :)

Saturday, August 11, 2012

Just a Little Video....

Just a little video for your viewing pleasure on this Saturday morning.  This is what I caught David doing last night while we were making dinner.


He's such a good sport! :)  Hope everyone has a wonderful Saturday!

Thursday, August 9, 2012

Latest Project!

Things have been so busy this week!  I did my 3 days and ended up getting called in to work last night so that made for 4 nights in a row--and boy was it a doozy.  Let's just say that I was very much tested as a nurse last night.  But I survived and I learned a lot!  BMW is coming out with a new model soon so they have been doing testing all week.  David has had to go in a few nights this week, so his schedule is kind of wacky, too!

But last weekend was my first weekend on my new schedule, so I didn't have to work!  David and I spent the day together and went out for Jessie's birthday / engagement dinner!  We found a really cute antique shop in Mauldin (Aunt PittyPats for those of you in the area...) and got a couple of frames for some crafts.

I love Pinterest and I have seen a lot of chalkboards in frames recently and love the idea!  So we found a cheap mirror/frame at the antique store, bought some chalkboard paint at Lowes, and just used paint we had around the house to actually paint the frame.

This was the frame before we started.  It had a mirror in it, but I had already taken it out :)  Plain jane frame.


We painted the frame with a cream color we bought for another project, haha!  It took about 2 coats for the frame.  We painted the mirror with 3 coats of chalkboard paint.  Once it dried, we sand- papered some of the edges and crevices.  David also had a wire brush that we used to make the darker color on the frame.


The finished project!  It was a pretty big frame and was perfect for a certain spot in our kitchen above our pantry!  We are so, so happy with how it turned out!